Managing Plugins
WordPress has a lot of functionality built-in, but occasionally you might find a specific need that isn’t a part of the default software. To accomplish this, WordPress has a plugin architecture where developers can create plugins that add additional functionality to your site. From simple photo galleries to site statistics, to automatic Twitter and Facebook sharing of posts, there is practically a plugin for whatever you need for your blog (over 23,000 at the time of this writing). To start using and installing plugins just follow these simple instructions:
- Log in to your WordPress dashboard.
- From the left side menu locate and click plugins.
- You will be given a list of all your currently installed plugins.
- From this menu you are able to activate and disable specified plugins by using either the single plugin options located under each plugin name.
- Or you may use the bulk action drop down menu to simultaneously activate/disable multiple plugins by checking desired plugins
- Additionally you may also sort through installed plugins using the sorting options above the bulk action menu.
Note: Some plugins may require additional activation steps.
Shortcode
A shortcode is a WordPress-specific code that lets you do nifty things with very little effort. Shortcodes can embed files or create objects that would normally require lots of complicated, ugly code in just one line. Shortcode = shortcut.
For a list of WordPress related shortcodes click here
WordPress Widgets
[wpmudev-video video=”widgets”]
Adding and Changing Widgets
Widgets are a more advanced feature of WordPress that allow you even more control over the content on your site. In essence, widgets are small containers of content that can be placed in various areas of your site. Where you can place widgets depends entirely on the theme you are using. Many (most) themes include at least one “sidebar” into which you can place widgets. Some themes include additional “widgetized” areas.
There are two ways to change your widgets. Both are accessed by clicking on “Appearance,” on the left sidebar.
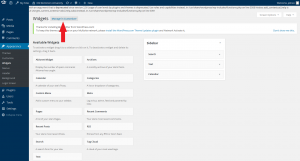
The best way to find out what areas are available to you is to go to Appearance > Widgets and take a look at the areas listed on the right. Each widgetized area will appear as a box on the right. In the example shown below, the theme contains three widgetized areas: Primary Sidebar, Content Sidebar, and Footer Widget Area.
On the left, you will see a number of widgets available to you. WordPress comes with some default widgets. Other widgets might become available when you have a particular theme activated. Finally, some plugins provide additional widgets to you.
Widgets can present all different kinds of information. The simplest widgets allow you to add text to your site. But you’ll also find widgets with many options that you can set to display dynamic content or to interact with other services. Below is a list of the default widgets available in WordPress.
When you’re ready to start using widgets, all you need to do is drag them from the right-hand side of the Widgets interface into the boxes on the left. WordPress will immediately save them, but you may need to set some options
The second is to click, “Manage In Customizer,” on the page that appears after clicking appearance then widgets. This will take you to a new page where you can toggle the page Widgets and see how they appear on your site.

Default Widgets
- Archives: Shows a monthly listing of your posts.
- Calendar: Shows a calendar view of your posts.
- Categories: Shows a list of all of the categories on your site.
- Custom Menu: Shows a custom menu that you’ve set up with WordPress’ Custom Menu interface.
- Links: Shows your links.
- Meta: Shows links to your RSS feed and your login.
- Pages: Shows a menu of all of your pages.
- Recent Comments: Shows the most recent comments on your posts.
- Recent Posts: Shows your most recent posts.
- RSS: Allows you to show content from an RSS feed.
- Search: Provides your users with a search box.
- Tag Cloud: Shows a “cloud” of the tags/categories on your site.
- Text: Shows whatever text you enter.
