WordPress Themes
Changing Your Blogs Title
General Settings: Site Title and Tagline
WordPress Themes
[wpmudev-video video=”change-theme”]
When it comes to WordPress, customizing the look of your site is simple and straightforward. When you install WordPress, the default (or pre-set) theme is called ODU Presentation Theme. It has been designed to provide a professional ODU presentation and is a very customizable theme. For example, while the default install doesn’t include a header, you have the option of adding one of your own images. You can also easily modify the colors of the different fonts and backgrounds used in the theme.
In addition to ODU Presentation Theme, you’ll have many other themes available to you. If ODU Presentation Theme doesn’t meet your needs, you can activate another theme on your site.
List of currently available themes at ODU
If you know of a theme that you would like to work with but it is not in the above list, you may submit a request to wordpress@odu.edu. Within three days, the new theme will be added to the pre-production system where it can be tested by other faculty and staff members to insure there is no problems. (The pre-production system can be accessed at http://wp.pprd.odu.edu/ from on campus or through the ODU VPN.)
After a theme has been thoroughly tested in the pre-production environment for at least two weeks, they can be moved to the live production environment for everyone to use. In addition to system updates and patches, ITS will move all new themes and plugins from pre-production to production at the beginning of every semester, and at the halfway points of Fall and Spring semesters. In order to limit service disruptions, security updates will be the only changes applied to the production system during the semester periods.
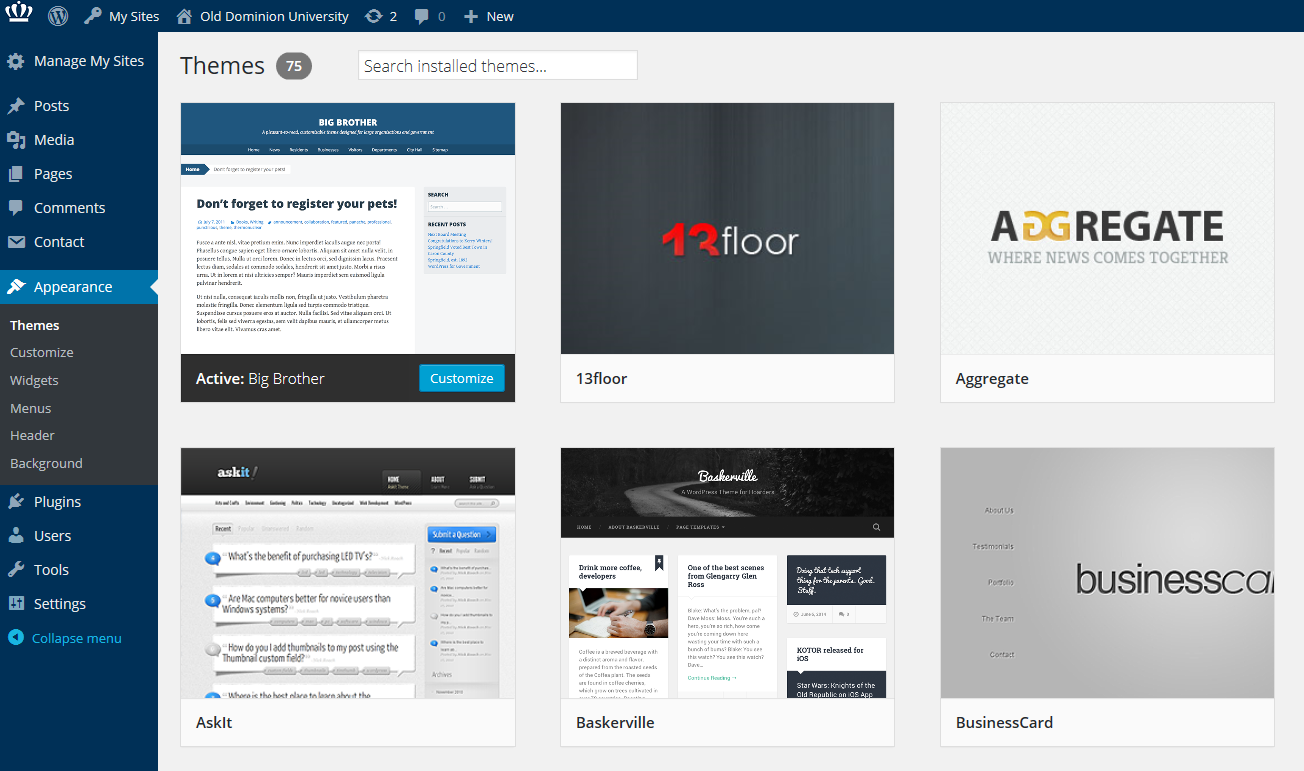
Activating Themes
- Start at your site’s Dashboard.
- Navigate to Appearance > Themes.
- You will see thumbnail images representing each of the themes that you currently have available on your site. Simply mouse over any one of them, and click the Activate link.
That’s all you need to do to change the look of your site with a new theme.
Changing Your Blog’s Title
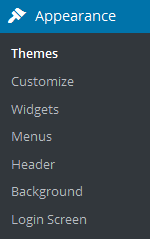
To start, click “Appearance” on the column on the left side.
Then click “Customize” one the sub menu that appears.
This will take you to a new page, and on the new page click “title and subtitle” on the left side column.
Enter your new title and subtitle in the new boxes that appear on the left side column.
General Settings: Site Title and Tagline
Now that you have your WordPress up and running, it’s time to look at some basic settings for your site. The place that you will access the settings for your site is called the Dashboard, and it provides the starting point for accessing all of your sites dials and knobs.
The setting we will look at here is your blog “title” and “tag line”. It is located under Settings > General.
Once you’re on the General Settings page, you can give your blog any title you want. You can also give your blog a tagline, which can be a short description of the blog.
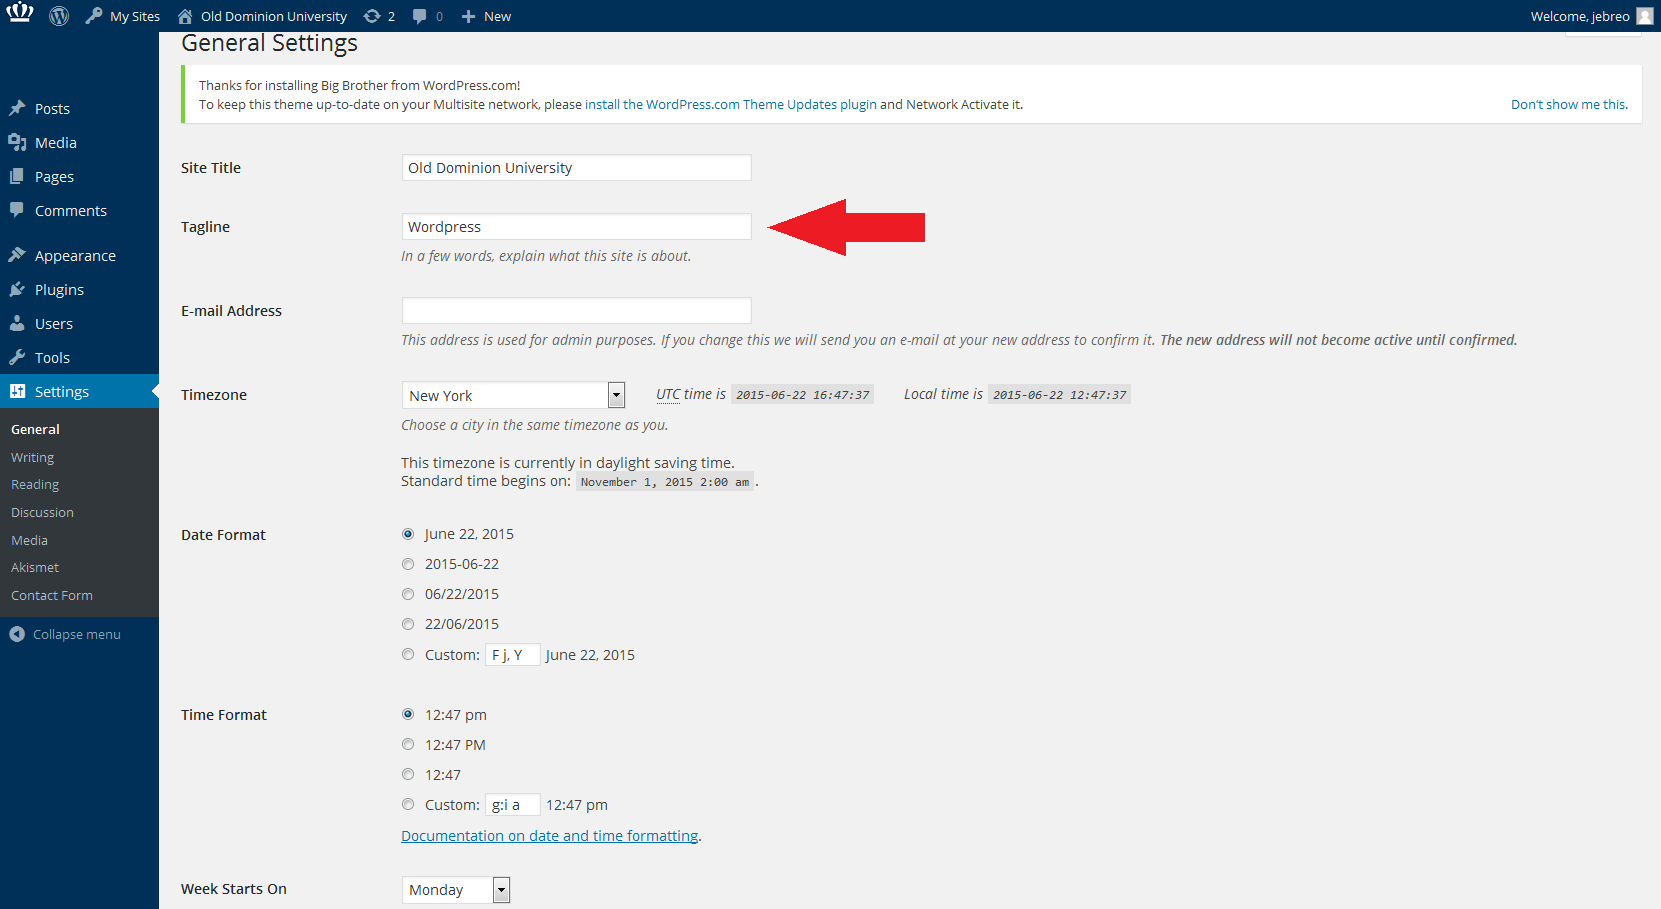
When you change the Blog title and tag line, they will show up at the top of your site. Depending on what theme you use, the title and tag lines will show up in various places. In the case of some themes, they might not show up at all depending on whether they allow custom configurations. We won’t worry about that for now.
There are more settings on the General Settings page, such as setting the administrative email account, time zone, date format, etc. Change those to whatever is appropriate for your site and geographical location.