Media
Uploading Files
Setting File Display Options
Contact Forms
Creating a Gallery
Visual Editor vs Text Editor
Media
[wpmudev-video video=”media-library”]
Media consists of the images, video, recordings, and files that you upload and use in your blog. Media is typically uploaded and inserted into the content when writing a Post or writing a Page.
Make sure to check out the Legal section of this guide before you post content that isn’t yours, or in the mean time you can use public domain images .
There are generally two approaches to handling media in WordPress:
Uploading
You can upload the files into your site’s Media Gallery and then link to them in your posts/pages. This works very well for images, and when you take this approach for images you have the added benefit of being able to make use of WordPress’ built in (albeit rudimentary) editing tools. Also, when you upload images to WordPress, it automatically creates different sizes that you can use, as needed. This approach works less well for audio and video. In order to have your media files actually show up in a “player” (with controls for stopping, pausing, etc.) you’ll need to install a plugin. Otherwise, you’ll only be able to include links to the files. How people view/listen to them will depend a bit on the setup on their own computer and in their own browser. They may, for example, have to download the media file and then open it in another program on their computer.
Embedding
You can embed media from other sites easily in WordPress. Embedding an image just means providing a URL to it’s location elsewhere on the Web. Instead of uploading it to the server, WordPress grabs that image from the external source and displays it on your post/page. However, with this approach you lose your editing capabilities as well as the resizing feature. Embedding audio and video from external sources becomes easier with every version of WordPress it seems. These days, you can embed video and audio from many external services (YouTube, Vimeo, SoundCloud, etc) by simply placing the full URL of the audio/video location on it’s own line in your post/page. You can learn more about embedding from external sources at the WordPress site. Our general advice is to use externally hosted media whenever it makes sense and works. This is *usually* the case when you need to use audio or video; without plugins, well-presented audio and video in WordPress is tricky. For images, if you need to do basic editing and/or require different sizes of images, upload them to your site. Otherwise, consider referencing them from another location (your Flickr account, for example).
Uploading Files
Whether you are uploading a file directly to WordPress, or embedding a file located on the web, the Media Library is responsible for organizing and managing images, documents, audio, video, and other kinds of files.
Accessing the Media Library

While editing a post: Click Add Media to use existing files or to upload a new file. This is the primary method for accessing the Media Library, as it allows you to both upload a file and place it in a post/page at the same time.
From the dashboard: Go to Media → Library to view files you’ve already uploaded, or Media → Add New to upload new files. This method is useful for uploading files you want to use later.
Uploading Files to the Library
Using a File from the Web

From the post/page editor, click Add Media, then Insert from URL. Enter the direct URL to the file you want to add to the Library (the URL will normally end in jpg or png for images, docx or pdf for text documents, etc), enter a title, and click Insert into Post. Note that files added this way are not stored in your Media Library; if the files are removed from the original storage location by the owner, they will no longer appear on your blog. Think carefully before choosing this method! Consider only using this method with files you control, e.g. images stored in your own Flickr account.
Using a File from Your Computer

Click Add Media from the post/page editor to go to the Upload Files tab of the Media Library. When uploading files, you may either drag and drop them into marked section of the browser window, or click Select Files to find the ones you want to upload from your computer. Pay attention to the current maximum upload file size limit, and make sure each file you upload is below the designated limit.
Using a Previously-Uploaded File

If you would like to re-use a file you have previously uploaded to your WordPress Media Library, simply click Media Library, find the file you want to use, and click to select it.
Setting File Display Options
After uploading or selecting your file from the Media Library, you will have the opportunity to enter additional details and to set display settings.
Images

1) For images, the most important of the text-based details are the:
- Caption, which should contain copyright / licensing information about the image, and the
- Alt Text, which will be displayed if a person’s browser cannot display images, or if a person is using a screen reader to access your blog. If you do not enter Alt Text for your images, screen readers could potentially get stuck and be unable to load the rest of your blog.
You may also wish to enter text into the Description field, and whether or not this is displayed will depend on what theme you are using. Each of these text fields accepts basic HTML (e.g. anchor tags to create links).
2) Under Attachment Display Settings, there are three drop-downs that provide you with options about how the image is displayed:
- Alignment: whether the image is justified to the left, right, or center
- Link to: where a visitor is taken when they click on the image. This can be useful if you are embedding a very large image that cannot be displayed at full size within the post/page you are creating; if you set this option to Media File, visitors can click on the embedded image to see a full-size version. If you are not embedding an image that needs to be viewed at full size, you can prevent the image from being clickable by setting this option to None.
- Size: whenever you upload an image, the WordPress Media Library automatically generates copies of the image at standardized sizes. Pick which version should be embedded into your post/page; the optimal size depends on your theme, but usually 600px is a good place to start.
3) When you are finished, click Insert Into Post/Page to continue editing your post/page.
Text Documents

1) For text documents, the most important of the text-based details is the title, which will be used as the text for the clickable link to this file. You will also have the ability to enter a caption and a description for your file. Whether or not these additional items are displayed will depend on what theme you are using. Each of these text fields accepts basic HTML (e.g. anchor tags to create links).
2) Under Attachment Display Settings, there is a Link To drop-down menu that lets you pick whether the link will go directly to the file you have uploaded, or to a WordPress attachment page that displays the file. The Media File option is the default, and is best for most circumstances.
3) When you are finished, click Insert Into Post/Page to continue editing your post/page.
Changing Display Options
Images

You can make changes to an embedded image by clicking on it in the post/page editor. Two new icons will appear in the top left-hand corner of the image. To make changes, click Edit Image, and to remove the image, click Delete Image. This will delete the image from your post, but it will remain in your Media Library for later use.
Text Documents

Once you have inserted the link to a file, you can change the text of the link by simply clicking on the link and making your desired edits. To change which file the link points to, or to update the caption or description, delete the link and recreate it.
Uploading External Files Using Plugins
Google Doc Embedder – Google Doc Embedder lets you embed several types of files into your WordPress pages using the free Google Docs Viewer – allowing inline viewing (and optional downloading) of a wide range of popular file types, with no Flash or PDF browser plug-ins required.
CSV Importer – This plugin imports posts from CSV (Comma Separated Value) files into your WordPress blog. It can prove extremely useful when you want to import a bunch of posts from an Excel document or the like – simply export your document into a CSV file and the plugin will take care of the rest.
Contact Forms
Posting allows people to get in contact with you without posting your contact information for everyone to see. To create one:
- First you will need to install the plugin “Contact Form 7”. From there simply go to the page you would like to add a contact form to and click the “Add Contact Form” button.

- If you chose to edit or add a field you will be able to create a name for the field and give it a field type (drop down, check-box, text field, etc)
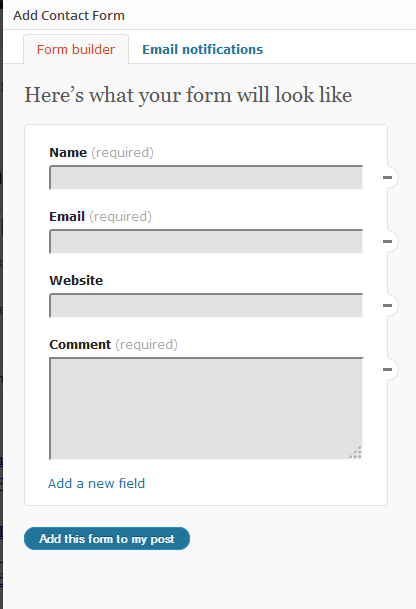
- If you would like to be notified when a form is submitted go to the “Email Notifications” tab. Fill in your email address and what you would like the subject line to be. Once you are done click the button on the bottom to save it

- Once you are done constructing your form click “Add this form to my post”
- If you want to go back and edit this form, simply click the “Add Contact Form” again and repeat the process as needed.
Creating a Gallery
WordPress does more than simply let you post images. You can post a whole gallery. This is a good for:
- A clean way to showcase many images on one page.
- A slideshow experience without an additional plugin.
- A title and optional caption overlay that appear when the user hovers their mouse over thumbnail images.
- Social sharing links and the title/caption overlay when the user hovers over expanded images.
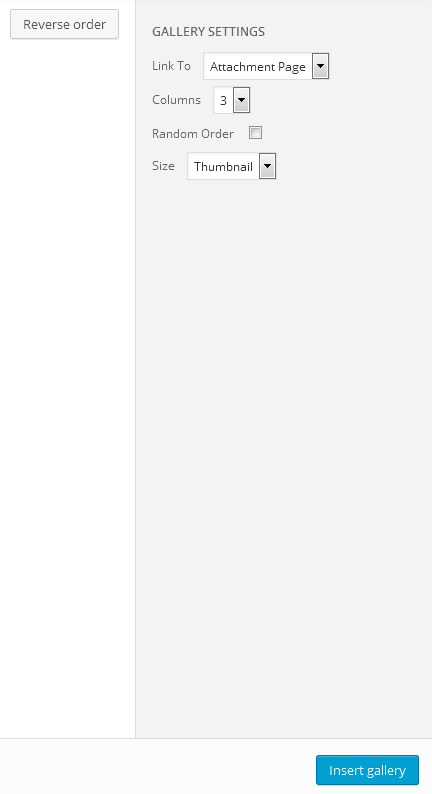
To begin edit a page that you wish to insert a gallery and click add media. In the left corner you will a button to add a gallery.

Once you have selected the the images you want to use, hit the “Create New Gallery” button. Now edit the gallery settings on the right side of the window. Feel free to experiment with this as there are several different options on how to display your gallery. Finally click “Insert Gallery”.
If you would like to go back and edit your gallery click on it (from the page editing screen) and click the pencil icon that appears.
Visual Editor vs. Text Editor
WordPress provides two different editors: a Visual editor and a Text editor. To switch between editing modes, look towards the top right-hand corner of the editing toolbar, and select either the Visual tab, or the Text tab.
The Visual editor is the default, and provides a series of icons for applying formatting similar to the ones found in word processors. What you see in the Visual editor is exactly what visitors will get when visiting your site. This makes editing text more intuitive, but it means that the Visual editor does not properly translate HTML (including embed codes) for visitors.

The Text editor has a formatting toolbar with text labels instead of icons. What you see in the Text editor is not necessarily what visitors will see when visiting your site; the strength of the Text editor is that you can enter HTML, including embed codes, and the Text editor will translate that code into the proper visual display.
