Posts vs Pages
Creating a Page
Creating a Post
Categories
Tags
Posts vs Pages
[wpmudev-video video=”pages-v-posts”]
As we have said before, WordPress provides two primary content types for you two work with: posts and pages.
In WordPress, you add content to your site primarily by creating posts and pages. Both can contain text, images, and other kinds of embedded media. Although the two look similar, they are different in several ways:
Posts –
[wpmudev-video video=”add-new-post”]
Posts are marked with a timestamp, and are displayed in reverse-chronological order on your blog’s front page by default. They can be easily grouped and displayed based on author, category, or tag. Posts also appear in your blog’s RSS feed, which you can use to automatically publish your writing on multiple sites. RSS can also be used by visitors to automatically subscribe to your blog, so they can read your posts without having to directly visit your site.
Posts might be what you use to share your regular thoughts, reflections, or ideas about a topic.
Post Formats
Recent versions of WordPress have built out a new “post format” feature which, if you are using a theme with the feature enabled, will style post formats differently depending on what they are. The formats that are built-in to WordPress (and are available for theme developers to use) are the following:
- aside – Similar to a Facebook note update.
- gallery – A gallery of images.
- link – A link to another site.
- image – A single image.
- quote – A quotation.
- status – A short status update, similar to a Twitter status update.
- video – A single video.
- audio – An audio file.
- chat – A chat transcript.
Those of you familiar with Tumblr may recognize this approach to post formats.
For the most part, post formats are designed as a way to style a site (and customize styling depending on the kind of content that is being displayed). They have no special functionality, and their use depends entirely upon the theme you are using. Many older themes, for example, do not recognize post formats.
Example: If you were using WordPress to build a business Web site with a lot of information content, you would probably use Pages. If you added a feature to that site where you started to advertise special events or news, you would probably use Posts.
Pages –
[wpmudev-video video=”add-new-page”]
Pages, are a more static form of content. Pages are marked with a timestamp, but are not displayed based on chronology, and cannot be grouped by author, category, or tag. Pages do not appear in your blog’s RSS feed, so they cannot be published automatically to other sites, and visitors must come directly to your blog to read pages. They are more likely to stand alone and be organized according to a traditional hierarchy. Pages might be content that is less frequently updated or changed. A static front page is sometimes a good idea if you want users of your blog/website to see a different landing page first. This way they are not just going right into the default or latest posts of your blog or website. This can be particularly helpful if you would like them to get some background information about your site or see something before they go straight into your blog.
Pages are additional areas to put information that don’t change very often.
A few other things to know about Pages vs Posts:
- If you want your content to be accessible to your users via RSS/syndication, you’ll need to use Posts. By default, Pages do not appear in a site’s RSS feed.
- Categories and Tags (which are used in WordPress to help you organize your content) are ONLY available on Posts. Page organization is done through customizing your site’s menus.
- Okay this get’s a little tricky: WordPress, by default, also creates “Category Pages” and “Tag Pages” that display all the Posts in a category or tag. These are NOT related to the regular Page type.
If you are using ODU WordPress as part of a course, you will most likely be asked to write posts for the majority of your work, although some courses do also use pages for certain assignments. When in doubt, check the syllabus, or ask your classmates or professor for clarification.
:Using plugins to add posts to pages:
Creating a Page
For some courses, you will need to create a page on your own personal blog; for others, you will need to create a page directly on the main course blog. Make sure you are on the correct Dashboard by looking in the menu across the top. If you are not in the right Dashboard, use the My Sites drop-down menu to go to the correct Dashboard.
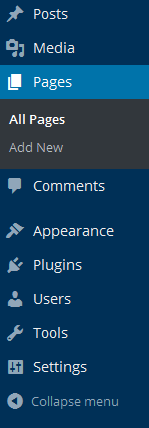
1) From the left sidebar, go to Pages → Add New.
2) In the Add New Page editing area, enter a title for your page. Be descriptive! You may be asked to include specific items in your page titles. When in doubt, consult the syllabus, ask a classmate, or check with the professor.
3) Type the content for your page into the larger text box. It’s best to compose your text directly in the browser window, if possible. If you are pasting text from Microsoft Word, the visual editor will do its best to remove any extraneous formatting that may cause problems on your blog.

4) When you are finished, find and click the Publish icon near the top of the right sidebar. Your page will now appear on the site.

Creating a Post
For some courses, you will need to create a post on your own personal blog; for others, you will need to create a post directly on the main course blog. Make sure you are on the correct Dashboard by looking in the menu across the top. If you are not in the right Dashboard, use the My Sites drop-down menu to go to the correct Dashboard.
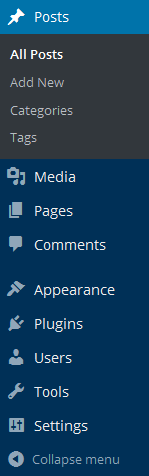
1) From the left sidebar, go to Posts → Add New.
2) In the Add Post editing area, enter a title for your post. Be descriptive, but not boring! Assignment #1, Paper #1, etc are NOT good titles. You may be asked to include specific items in your post titles, so when in doubt, consult the syllabus, ask a classmate, or check with the professor.
3) Type your post into the larger text box. It’s best to compose your text directly in the browser window, if possible. If you are pasting text from Microsoft Word, the visual editor will do its best to remove any extraneous formatting that may cause problems on your blog.

4) You may be asked to add certain tags or categories to your post. Scroll down the Add Post page and look for the Categories and Tags widgets on the right side.
Categories
Categories are a way to organize your post and pages so one can easily sort through them
If the category you need has already been created, you can simply check the box next to the right category. Otherwise, click the Add New Category link and enter the category name.
Tags
Tags, like categories, also organize your posts and pages. However tags, are generally more specific For example if there was a category of “Sports”, a tag might be “Football” or “Equipment.”
To see all existing tags on this blog, click the “Choose from the most used tags” link. If a tag that you want to use already exists, click on its name to apply it to your post. Otherwise, you can add tags by typing them into the box either one at a time or as a comma-separated list (e.g. summer, spring, fall) before clicking Add.
When in doubt about what categories or tags to use, consult the syllabus, ask a classmate, or check with the professor. Overall categories and tags are an optional feature when it comes to the functionality of your site.

5) When you are finished, find and click the Publish icon near the top of the right sidebar. Your post will now appear on the site.
